Making a Simple Mahl Stick Easel Attachment
Hiya guys, this here is the second part of the improvements I did for my easel recently, focusing on the WIP of the 'Mahl Stick' this time. (Check out the first part at 'Making a Simple Shelf Addition for Easel').
I've used a traditional mahl stick in the past with the padded end covered with fabric, but having to hold it in one hand while anchoring it to the easel or artwork while I worked (not ideal) was really restrictive and just made the whole process awkward and uncomfortable.. Needless to say I hardly ever used one..
There had to be a better alternative. Thus with a little online search I discovered quite a few artists had struggled with the same problems and had come up with their own alternatives.. None of them were exactly what I wanted however but they did help me come up with one that I hoped would work perfectly for me and would be quick and easy to make myself.
 |
| Here the mahl stick has been attached to the right side of the slider, and can move freely along that side. If I wish to have it on the left side I just have to slide it out of the right end and slide it back in on the left side of the slider.. |
The Mahl Stick has been attached to the easels header that slides up and down freely so as to accommodate a variety of artwork sizes. The mahl stick is attached to the header with a slider that enables me to slide the mahl stick left to right.Unfortunately the mahl stick is blocked from moving through the middle because of the header, however this is not too much of a problem as it can be slide out from one side of the slider and into the other quite easily.
Equipment Used
- Handsaw
- 2 G-Clamps (to hold wood while sawing and for clamping wood that were being stuck together)
- Power drill
- Sandpaper
- Masking Tape
Materials for Mahl Stick (including handscrew fixture used to attach it to the slider)
- 2 pieces of 0.5"x 0.5"x 44" in length wood (it can be longer but this is what I had and it was fine for my purposes)
- 2 pieces of 0.5" x 0.2" x 2.5" in length wood
- 2.7" Set screw (anything between this and 2" would work fine too)
- Hand Knob (was lucky to have an extra one retrieved from an old music stand I had)
- 2 flat washers
- 1 metal nut
- PVA wood Glue
- Thick Linseed Oil for a nice finish and to protect the wood
 |
| From left: 2.7" set screw, 2 flat washers, metal nut, hand knob |
 |
| The 0.5 " x 0.2" had not been cut to 2.5" yet in this pic |
Making the Mahl Stick
1. Once the wood was cut to the lengths needed, the thinner 0.5" x 0.2" x 2.5" pieces were sandwiched & clamped (with the PVA glue) between both ends of the 0.5" x 0.5" x 44" pieces of wood (using my G clamps which were not ideal for the job but worked fine in the end) till the glue had thoroughly dried. This left me with a 44" mahl stick with a 39"gap running along its middle.
2. Once the glue had completely dried, the mahl stick was given a good sanding with nice rounded/curved edges.
 |
| One end of the mahl stick right after sanding |
3. A liberal layer of thick linseed oil was then applied over the wood and then left to dry for a few days. ( for the best protection one should apply more than one layer till the wood stops absorbing the oil as much)
 |
| All the parts of the handscrew fixture put together. |
With the mahl stick done, next is the slider!
Materials for Slider attached to Adjustable Easel Header
- 2 pieces of 0.75"x 0.75"x 26" in length wood (this too can be longer depending on your needs and studio space)
- 1 pc 0.25" x 0.75"x 3" plywood
- 2 pc 2.5" long screws
- Adjustable Header (that came with my easel)
- Thick Linseed Oil for a nice finish and to protect the wood
 |
| From top: 0.75" x 0.75" wood, 2.5" screws, 0.25" x 0.75 " x 3 plywood, 0.75" x 0.75" wood, header. |
 |
| My easels adjustable header right side up |
As I mentioned in my previous post, my easel has an adjustable header that can be moved freely up and down the whole length of the easel, and be fastened in place where need be to hold artwork in place from the top.
However this header (above) has a thick edge that can cast quite a nasty shadow over the work underneath and also makes it difficult to paint the tops of my art-pieces. Thus I never use it and it usually sits way up, far above my artwork. However it was perfect to secure the slider for the mahl stick.
Making the Mahl Stick Slider
1. With the pieces of wood cut to size, the centers were marked and the 0.25" x 0.75"x 3" plywood was sandwiched dead center between the 0.75"x 0.75"x 26" pieces of wood. This center was then tightly wrapped with masking tape to hold all in place for the next stage.
2. With the G clamps I then clamped my sandwiched & taped pieces of wood, dead center to the bottom of the header (to be honest if I wasn't careful the clamps would slide off and the whole thing was rather precarious. My drilled holes were not quite straight as a result but that is more of an esthetic gripe for me rather than a utilitarian one). The side of the wood flush with the headers groove.
 |
| The side of the slider wood flush with the headers groove. |
3. Two holes were then drilled for the 2.5" screws that were to hold all the wood and header together.
 |
| Header with the slider wood screwed in with the 2.5" screws. ( A layer of linseed oil has already been applied to the slider in this image) |
4. After checking everything screwed in and fit properly together, it was all dismantled again and the wood seasoned with a liberal layer of thick linseed oil for protection and a rich finish. As for the mahl stick this was left to dry for a few days before it was all reassembled again.
 |
| Testing before disassembling it again to be seasoned with linseed oil. |
 |
| The slider reassembled after it had been seasoned with linseed oil. |
Putting it all together
Now with all the parts complete, all that needed to be done was to get just the right tension/ tightness so that the mahl stick would not budge with the hand knob fully tightened, by adjusting the nut on the mahl sticks handscrew fixture.
 |
| The mahl stick attached to the slider. |
With the nut set at just the right distance, all that needs to be done to tighten or loosen the mahl stick to the slider are a few twists to the hand knob. The mahl stick is thus moved freely or held solidly in place with ease.
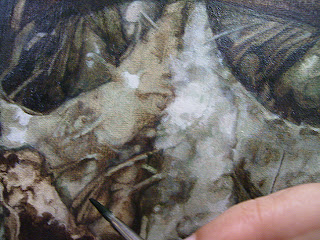
 |
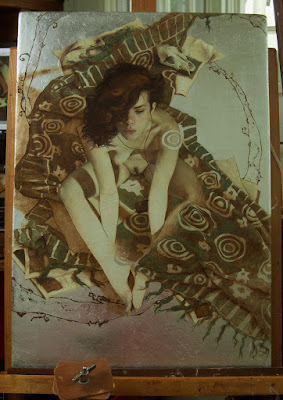
| More info on this painting can be found at The Dress. |
Thus far everything has been working as I had hoped. The little piece above being the latest to benefit from the new additions..
Hopefully this disorderly post was helpful, don't hesitate to drop me a message if you have any questions guys!
Ta for now!..


Comments
Post a Comment